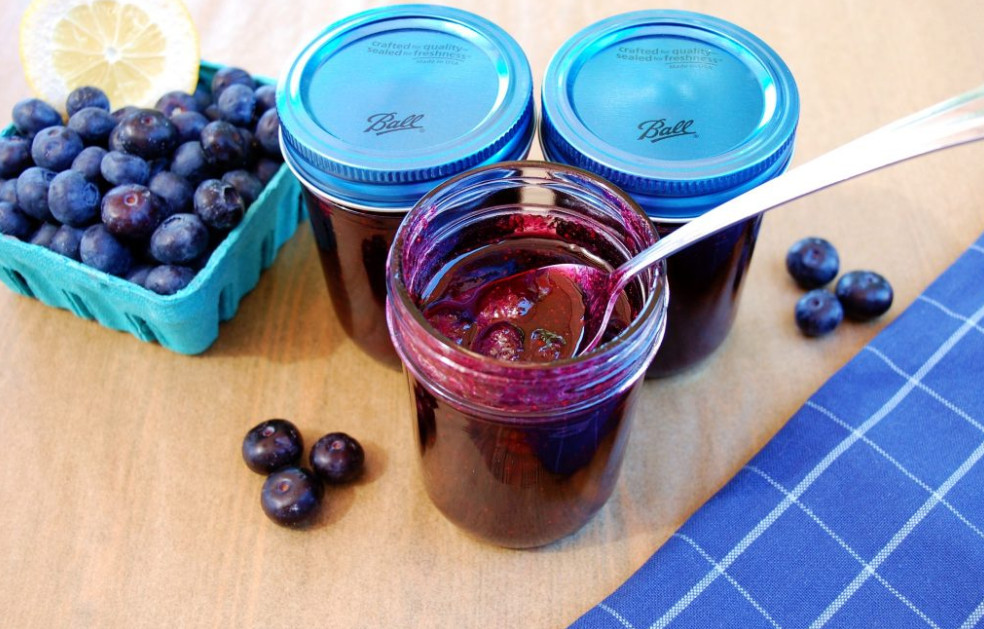
Ball Blueberry Jam Recipe | Sweet & Homemade
Nothing beats the taste of homemade jam, especially when it’s made with fresh, juicy blueberries. I love using Ball canning jars for this recipe; they not only preserve the jam beautifully but also give it that rustic, homemade charm. This Ball Blueberry Jam Recipe has become one of my go-to summer canning projects because it’s simple, foolproof, and always a hit with family and friends.
If you’ve never made jam before, don’t worry! This recipe is straightforward and doesn’t require fancy equipment. In fact, you’ll be amazed at how quickly blueberries transform into a rich, velvety spread that’s both sweet and slightly tart. It’s the perfect balance.
And here’s the best part: once you’ve mastered this recipe, you’ll have endless ways to enjoy it, on fresh biscuits, layered in cakes, or even as a filling for thumbprint cookies. Trust me, you’ll want to make more than one batch!
Blueberry Jam Preparation
Making this jam is easier than you might think, and I’ll guide you through every step. The secret to a smooth and flavorful jam is patience, allowing the blueberries, pectin, and sugar to cook together until they reach the perfect consistency.
Step 1: Preparing the Blueberries
I always start by rinsing the blueberries under cool water and removing any stems or leaves. Once they’re clean, I measure out 10 cups. From this, I set aside 2 cups of blueberries and place them in a large stockpot. Using a potato masher, I gently crush them to release their juices. This helps the jam develop that rich, fruity base.
Step 2: Adding the Rest of the Blueberries
Next, I add the remaining blueberries into the pot, crushing them as I go. Don’t worry if the berries aren’t perfectly mashed; some chunks are good because they give the jam a wonderful texture.
Step 3: Stirring in Lemon Juice and Pectin
Now comes the science behind jam-making. I stir in the lemon juice and the Sure-Jell fruit pectin. The lemon juice not only enhances the flavor but also helps the jam set correctly. The pectin is key for thickening, so make sure it’s mixed in well before moving to the next step.
Step 4: Bringing the Mixture to a Boil
Over medium-high heat, I bring the mixture to a rolling boil while stirring constantly. A rolling boil is when the mixture bubbles vigorously and doesn’t stop even when stirred. This is a crucial step because it ensures that the pectin activates properly.
Step 5: Adding the Sugar
Once the mixture is boiling, I add the sugar, one cup at a time, stirring continuously with a whisk or wooden spoon. Adding the sugar gradually ensures that it dissolves completely and prevents graininess in the final jam.
Step 6: Final Boil
After all the sugar is added, I bring the jam back to a rolling boil. This time, I let it boil hard for exactly 1 minute, stirring constantly. This final step locks in the jam’s texture and ensures it will set beautifully once cooled.
Step 7: Testing the Jam (Optional)
If you want to be extra sure your jam is ready, you can do the plate test: Place a small spoonful of jam on a chilled plate, let it sit for 30 seconds, then run your finger through it. If it wrinkles slightly and holds its shape, it’s ready. If not, boil for another 30 seconds and test again.
Filling the Jars & Canning Process
Canning may sound intimidating, but trust me, it’s easier than you think, and it makes all the difference for long-lasting jam. Here’s how I do it with my Ball Mason Jars:
Step 1: Sterilize the Jars
I start by washing the jars, lids, and bands with hot soapy water. Then I place the jars in a large pot of boiling water for about 10 minutes to sterilize them. This ensures that the jam stays safe to eat and bacteria-free. I keep the jars hot until I’m ready to fill them.
Step 2: Filling with Hot Jam
Using a ladle and funnel, I carefully pour the hot blueberry jam into the sterilized jars, leaving about ¼ inch of headspace at the top. This space is crucial because it allows the jam to expand slightly during the sealing process.
Step 3: Wiping and Sealing
Before sealing, I always wipe the rims of the jars with a clean, damp cloth to remove any sticky residue. Then I place the lids on top and screw on the bands until they’re fingertip tight (not too loose, not too tight).
Step 4: Water Bath Canning
Next, I lower the jars into a large pot of boiling water, making sure they are completely submerged. I process them for 10 minutes to ensure they seal correctly. If you live at a higher altitude, you may need to adjust the processing time slightly.
Step 5: Cooling & Checking Seals
After processing, I carefully remove the jars with canning tongs and place them on a towel to cool at room temperature. Within an hour or two, you’ll hear that magical “pop” sound, which means the jars are sealed. To double-check, press the center of each lid; if it doesn’t spring back, it’s sealed perfectly.
Storage Instructions

Short-Term Storage
Once sealed, jars of blueberry jam can be stored in a cool, dark place such as a pantry or cupboard for up to 12–18 months. Once opened, keep the jar in the refrigerator and use it within 3–4 weeks.
Freezing Option
If you don’t want to go through the canning process, you can store your jam in freezer-safe jars or containers. It will keep in the freezer for up to 6 months. Just thaw in the refrigerator before using.
Pro Tip:
I always label my jars with the date I canned them. That way, I know which ones to use first. Plus, they make adorable homemade gifts for friends and family, add a ribbon and a handwritten label!
Serving and Enjoying Blueberry Jam
Homemade blueberry jam is so versatile that I always keep a few jars on hand. Here are some of my favorite ways to enjoy it:
- Classic Toast & Butter: A simple slice of toasted bread with a generous spread of jam is pure comfort.
- Jam-Filled Cookies: Try thumbprint cookies filled with blueberry jam for a sweet bite-sized treat.
- Breakfast Boost: Swirl it into yogurt, oatmeal, or top your pancakes and waffles for a fruity upgrade.
- Cheese Board Pairing: It pairs beautifully with brie, goat cheese, or sharp cheddar on a charcuterie board.
- Baking Secret: Spread it between cake layers or use it as a filling in pastries for a burst of flavor.
Recipe Notes
- For a smoother jam, you can puree half the blueberries before cooking.
- If you like chunkier jam, mash lightly and leave more whole berries.
- Please don’t skip the lemon juice, it’s essential for both flavor and safe preservation.
- Want less sugar? Use a low-sugar pectin option and adjust sweetness to taste.
Ball Blueberry Jam Recipe
Ingredients
Video
Notes
Required Kitchen Tools
To make this Ball Blueberry Jam Recipe, having the right tools makes the process much smoother. Here’s what I always keep on hand:- Large Stockpot: For cooking down the blueberries and sugar mixture.
- Potato Masher: Essential for crushing blueberries evenly and releasing their juices.
- Wooden Spoon or Whisk: Helps with constant stirring to prevent burning.
- Ladle & Funnel: Makes it easy to transfer hot jam into jars without mess.
- Ball Mason Jars with Lids: The best jars for sealing and preserving homemade jam.
- Canning Tongs: For safely handling hot jars during the water bath process.
Frequently Asked Questions (FAQ)
Can I use frozen blueberries for this Ball Blueberry Jam Recipe?
Yes! Frozen blueberries work just as well as fresh ones. Just make sure to thaw them first and drain any excess liquid before starting the recipe.
Do I have to use pectin in blueberry jam?
While blueberries naturally contain some pectin, adding Sure-Jell fruit pectin ensures that your jam sets properly and has the right consistency. Without pectin, the jam may turn out runnier and require longer cooking time.
How long does homemade blueberry jam last?
If properly canned and sealed, blueberry jam can last 12–18 months in a cool, dark place. Once opened, store it in the refrigerator and use it within 3–4 weeks.
Can I reduce the sugar in this recipe?
Yes, but you’ll need to use a low-sugar pectin designed for reduced-sugar jams. If you cut the sugar without adjusting the pectin, the jam may not set correctly.
What if my jam doesn’t set?
Don’t panic! Sometimes jam can take up to 48 hours to fully set after canning. If it’s still runny after that, you can re-cook it by adding more pectin and boiling again for 1 minute.
Do I need to sterilize Ball jars before filling?
Yes, sterilizing is an important step to prevent bacteria and ensure a long shelf life. Wash jars, lids, and bands, then boil the jars for about 10 minutes before filling.
Can I skip the water bath canning process?
If you’re planning to eat the jam right away, you can skip canning and store it in the fridge for up to 4 weeks. But for long-term storage, water bath canning is essential.
Conclusion
Making your own Ball Blueberry Jam Recipe is not only rewarding but also an excellent way to preserve the taste of summer. With just a few simple ingredients and the reliability of Ball jars, you can create a delicious, homemade spread that lasts all year long.
Whether you’re spreading it on warm biscuits, gifting it to loved ones, or baking with it, this jam is guaranteed to bring joy to your kitchen. The best part? Every time you pop open a jar, you’ll be reminded of those fresh summer blueberries.
So grab your blueberries, your Ball jars, and a little bit of time, you’ll be amazed at just how easy and delicious homemade blueberry jam can be.

Sophia Smith is a passionate home baker and dessert enthusiast who loves sharing her favorite recipes, baking tips, and kitchen secrets. Through Roses Baking Passion, she inspires others to bake with love and creativity every day.