Wild Bill’s Beef Jerky Recipe | Easy Homemade Guide
Craving that bold, smoky, salty-sweet flavor of Wild Bill’s Beef Jerky? I’ve got you covered! This homemade Wild Bill’s Beef Jerky recipe lets you recreate the famous taste right in your own kitchen. With a perfect balance of Worcestershire sauce, soy sauce, honey, and spices, you’ll get chewy, flavorful strips of beef that rival the store-bought classic. Whether you’re making it for road trips, camping, or to snack on at home, this jerky recipe is guaranteed to satisfy.
Preparation & Marination
Making homemade Wild Bill’s Beef Jerky is all about building layers of flavor. The marinade gives that salty-sweet kick, while slow cooking (or smoking) brings out the chewy, smoky finish we all love. Here’s precisely how I do it:
Step 1: Slice or Prepare the Beef
If you’re using lean ground beef, form it into thin strips or small flat pieces. For traditional jerky made from whole muscle beef (like top round, flank steak, or sirloin), take a sharp knife and slice the meat into thin, even strips, about ¼ inch thick. For the most authentic texture, slice against the grain, which keeps the jerky chewy but not too harsh.
Step 2: Make the Marinade
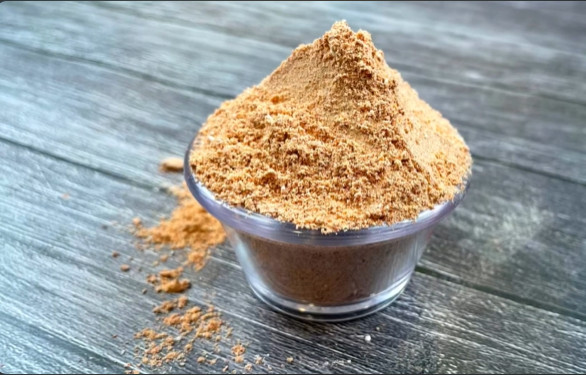
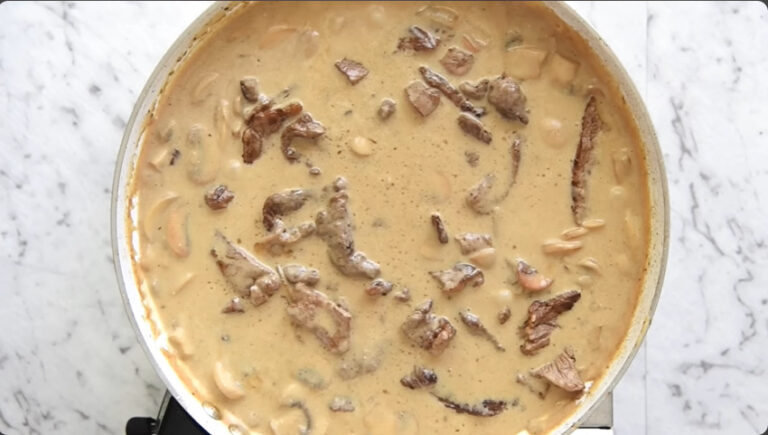
In a medium-sized glass bowl, I start with the wet ingredients: soy sauce and Worcestershire sauce. Then I add honey for sweetness, followed by brown sugar, garlic powder, onion powder, and black pepper. I whisk until the sugar fully dissolves, making sure the flavors blend into a bold, savory marinade.
Step 3: Marinate the Beef
I place the beef strips into the bowl and stir until every piece is coated. To really let the flavors soak in, I cover the bowl with plastic wrap and refrigerate it for at least 30 minutes. For a deeper flavor, you can let it marinate overnight. The longer the marination, the richer and more intense the jerky will taste, just like Wild Bill’s signature style.
Step 4: Prepare the Cooking Surface
Before cooking, I lightly oil my grill or wire rack. This prevents sticking and ensures the strips dry evenly. If I’m using an oven, I set it to the lowest temperature (usually around 170°F) and place a baking sheet lined with foil beneath the rack to catch drips. If I’m using a smoker, I set it to a low and steady heat for that authentic smoky punch.
Cooking & Drying the Jerky
Once the beef is marinated and ready, it’s time to transform it into chewy, flavor-packed jerky. This step is all about low and slow cooking; you want to dry out the meat without overcooking it. Here’s how I do it:
Step 1: Arrange the Beef Strips
I lay the marinated beef strips flat on the wire rack, leaving a little space between each piece. This spacing helps air circulate so the meat dries evenly. If you overcrowd the strips, some pieces will cook faster than others and lose that perfect jerky texture.
Step 2: Set the Temperature
Whether you’re using a smoker, grill, or oven, the key is keeping the temperature low, around 160–170°F (70–75°C). Too hot, and the beef cooks instead of drying. Too low, and it won’t dehydrate properly.
- Smoker Method: I smoke the beef on low heat for about 2–3 hours, depending on thickness. The smoke gives it that extra Wild Bill’s style
- Oven Method: I bake the beef at the lowest setting (usually 170°F) with the oven door slightly cracked open to let moisture escape. This takes about 3–4 hours.
- Grill Method: On a charcoal grill, I keep the coals low and indirect, letting the beef strips slowly dry out over a few hours.
Step 3: Flip & Monitor
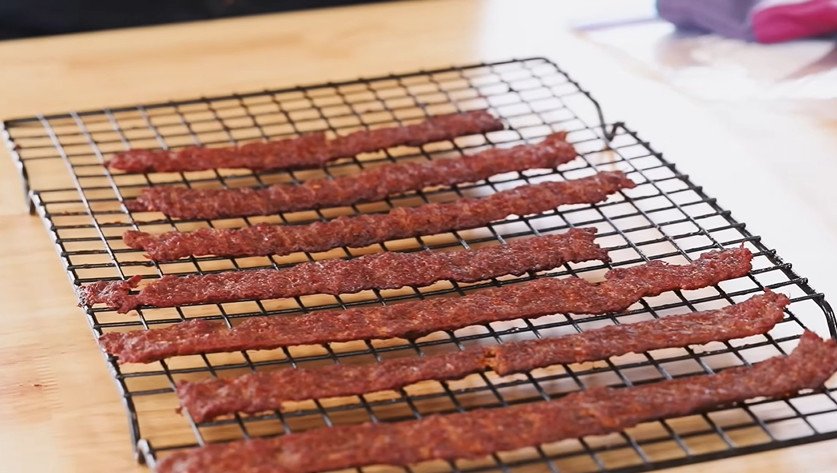
About halfway through, I flip each strip to make sure both sides dry evenly. I also check the texture, jerky should be firm and slightly pliable, not brittle. When I bend a piece, it should crack a little but not snap in half.
Step 4: Rest & Cool
Once the jerky reaches the right texture, I remove it from the heat and let it rest on a cooling rack. This allows excess moisture to evaporate and keeps the jerky from softening in storage.
At this stage, your kitchen smells fantastic, and you’ve got perfectly chewy, savory jerky strips ready to devour.
Serving & Enjoying
One of my favorite things about this homemade Wild Bill’s Beef Jerky Recipe is how versatile it is. I love packing it for road trips, keeping a stash for post-workout protein, or serving it alongside an ice-cold beer during game night. The savory, smoky bite pairs beautifully with craft beers, bourbon, or even a fizzy soda if you’re keeping it casual.
You can also experiment with variations:
- Add extra black pepper for a bolder, spicier kick.
- Swap in teriyaki sauce for a sweeter, Asian-inspired twist.
- Sprinkle crushed red pepper flakes into the marinade for a fiery version.
Storage Instructions
Keeping jerky fresh is all about storing it the right way.
Short-Term Storage
If you plan to eat it within a week, store the jerky in an airtight container or resealable bag at room temperature. Just make sure it stays in a cool, dry place.
Longer Storage
For jerky that lasts up to 2–3 weeks, I recommend refrigerating it in a sealed bag. If you want to stretch it to 1–2 months, place the jerky in a vacuum-sealed bag or freezer-safe container and keep it in the freezer. It thaws quickly and tastes just as fresh.
Wild Bills Beef Jerky Recipe
Ingredients
Video
Notes
Required Kitchen Tools
When making beef jerky at home, the right tools make all the difference in achieving that signature chewy texture and smoky flavor.- Sharp Knife or Meat Slicer – To cut the beef into thin, uniform strips for even drying.
- Mixing Bowl – A medium-sized glass bowl for combining your marinade and coating the beef.
- Plastic Wrap or Airtight Bag – To cover and marinate your beef properly without losing flavor.
- Grill, Smoker, or Oven – For cooking and dehydrating the beef to perfection.
- Wire Rack & Baking Sheet – Helps air circulate around the meat if using an oven.
- Tongs – For flipping strips during drying and preventing burns.
Frequently Asked Questions (FAQ)
Can I use ground beef for this Wild Bill’s Beef Jerky recipe?
Yes! I often use lean ground beef (at least 90% lean) to make jerky. It’s easier to shape into strips and dries evenly. Just make sure you press it firmly so it holds together during cooking.
What’s the best cut of beef for homemade jerky?
If you’re not using ground beef, I recommend top round, bottom round, flank steak, or sirloin tip. These cuts are lean, affordable, and slice beautifully into thin strips.
How long should I marinate the beef?
I usually marinate my beef for at least 30 minutes, but if I want that deep Wild Bill’s flavor, I let it soak overnight in the fridge. The longer the marinade, the stronger the taste.
Can I make jerky without a smoker or dehydrator?
Absolutely! I often use my oven at the lowest setting (around 170°F) with the door cracked open. A wire rack over a baking sheet works perfectly. If you love that smoky flavor, you can add a drop of liquid smoke to the marinade.
How do I know when the jerky is done?
Jerky is ready when it’s firm, slightly chewy, and bends without snapping. If it breaks apart easily, it’s overcooked. I like mine to have that classic chewy bite, just like Wild Bill’s.
How long does homemade beef jerky last?
At room temperature in an airtight container, it lasts about 1 week. In the fridge, it stays suitable for 2–3 weeks. If vacuum-sealed and frozen, it can last up to 2 months.
Can I make spicy Wild Bill styleerky?
Definitely! I sometimes add crushed red pepper flakes, cayenne pepper, or hot sauce to the marinade. It gives the jerky that fiery kick without losing the classic smoky-sweet flavor.
Conclusion
And there you have it, my homemade Wild Bill’s Beef Jerky Recipe that’s smoky, chewy, and absolutely addictive. By marinating lean beef in a bold mix of soy sauce, Worcestershire, honey, and spices, then drying it low and slow, you get jerky that tastes just like the classic Wild Bill’s, but fresher, cheaper, and customizable.
If you’re like me, once you make your first batch, you’ll never want to go back to store-bought. So fire up that oven or smoker, roll up your sleeves, and start making your own Wild Bill-style beef jerky at home. Trust me, your taste buds will thank you!

Sophia Smith is a passionate home baker and dessert enthusiast who loves sharing her favorite recipes, baking tips, and kitchen secrets. Through Roses Baking Passion, she inspires others to bake with love and creativity every day.