Mary Berry Green Tomato Chutney Recipe
Craving a traditional British preserve with a burst of tangy-sweet goodness? Let me introduce you to Mary Berry’s Green Tomato Chutney, a recipe that’s been perfected over time and is ideal for using up those firm, end-of-season tomatoes. The combination of green tomatoes, crisp apples, plump raisins, aromatic spices, and vinegar creates a chutney that balances sharpness and sweetness beautifully.
Whether you’re a chutney connoisseur or making it for the first time, this recipe is simple to follow and yields a delicious, versatile condiment you’ll be proud to share with friends and family.
Chutney Preparation
Preparing green tomato chutney is straightforward, but taking your time with each stage ensures you get a rich, well-balanced flavor.

Step 1 – Prepping the Ingredients
I start by giving my green tomatoes a good wash before chopping them into small, even pieces. This helps them break down evenly during cooking. I do the same with the apples, peel, core, and chop them, and then finely chop the onions.
Once all the fresh produce is ready, I measure out the raisins, sugar, vinegar, salt, and spices. Having everything prepared before starting to cook makes the process smooth and stress-free.
Step 2 – Combining and Starting the Cook
I place the chopped tomatoes, apples, onions, and raisins into a large heavy-bottomed saucepan. Then, I add in the brown sugar, cider vinegar, salt, mustard seeds, ground ginger, allspice, cinnamon, and cayenne pepper.
Using a wooden spoon, I give everything a good stir so the sugar starts to dissolve and the ingredients are evenly coated in the spices.
Step 3 – Bringing to the Boil
With the heat set to high, I bring the mixture to a rolling boil. The aroma at this stage is incredible, a mix of tangy vinegar, sweet sugar, and warm spices.
As soon as it’s boiling, I reduce the heat to low, allowing the chutney to simmer gently.
Step 4 – The Slow Simmer
This stage takes around 1 hour. I stir the mixture occasionally to prevent sticking and make sure the chutney thickens evenly. The liquid slowly reduces, and the fruit and vegetables soften into a rich, glossy mixture.
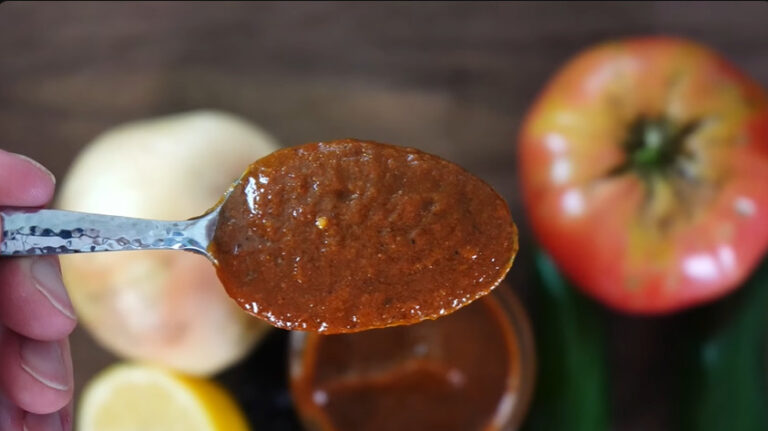
The chutney is ready when it’s thick enough that running a spoon through it leaves a clear trail at the bottom of the pan.
Bottling and Storage Instructions
Step 5 – Sterilizing the Jars
While the chutney is in its final stages of simmering, I prepare my jars. Sterilization is essential to keep your chutney fresh and safe to eat for months.
I wash the jars and lids in hot, soapy water, then rinse them well. Next, I place them in a large pot of boiling water for about 10 minutes or pop them in a preheated oven at 275°F (135°C) for the same time. This ensures any bacteria are killed before filling.
Step 6 – Filling the Jars
Once the chutney is ready, I remove it from the heat and let it cool for just a few minutes, not too long, as it needs to be hot when going into jars.
Using a jar funnel and ladle, I carefully spoon the chutney into each sterilized jar, leaving about ½ inch (1 cm) space at the top. I wipe the rims clean with a damp cloth before sealing tightly with sterilized lids.
Step 7 – Cooling and Storing
I leave the jars to cool completely at room temperature before moving them to storage. The chutney can be enjoyed immediately, but for the very best flavor, I like to let it mature for at least 3–4 weeks in a cool, dark cupboard.
When stored properly, the chutney keeps for several months. Once opened, keep it in the fridge and use it within 4–6 weeks.

Serving Suggestions
This chutney is incredibly versatile and can be enjoyed in so many ways:
- With Cheese & Crackers: A sharp cheddar or creamy brie pairs beautifully with the tangy sweetness.
- In Sandwiches: Spread it on bread with cold meats, especially ham or turkey, for a flavor boost.
- Alongside Roasts: Works as a sweet-and-spicy condiment for roast pork, chicken, or beef.
- With Vegetarian Dishes: Try it with a lentil loaf, veggie burgers, or baked sweet potatoes.
Tips for the Best Green Tomato Chutney
- Choose Firm Green Tomatoes: Overripe ones can turn mushy and alter the texture.
- Adjust the Spice: Add more cayenne for heat or reduce it for a milder chutney.
- Patience Pays Off: While it’s tempting to eat it straight away, giving the chutney time to mature deepens the flavor beautifully.
- Double the Batch: If you have plenty of green tomatoes, make extra; it makes an excellent homemade gift.

Mary Berry Green Tomato Chutney Recipe
Ingredients
Video
Notes
Required Kitchen Tools
Making green tomato chutney is a rewarding process, but having the right tools makes it even easier:- Large Heavy-Bottomed Saucepan – Essential for cooking the chutney evenly without burning.
- Wooden Spoon – For stirring and mixing ingredients without scratching your pan.
- Sharp Chef’s Knife & Chopping Board – To chop your tomatoes, apples, and onions efficiently.
- Measuring Scales & Jug – To get your ingredient quantities spot-on.
- Sterilized Glass Jars & Lids – For storing your finished chutney safely.
- Jar Funnel & Ladle – To transfer chutney into jars without mess.
FAQ – Mary Berry Green Tomato Chutney
1. Can I use red tomatoes instead of green tomatoes?
You can, but the flavor will be sweeter and less tangy. Green tomatoes have a firmer texture and sharper taste, which is what makes this chutney unique.
2. How long should I let the chutney mature before eating?
While you can eat it straight away, it’s best to leave it for at least 3–4 weeks. This allows the flavors to blend and deepen.
3. How do I know when the chutney is ready during cooking?
The chutney is ready when it has thickened enough that running a spoon through it leaves a clear trail at the bottom of the pan.
4. Can I freeze green tomato chutney?
Yes, although it’s not the traditional method. Allow the chutney to cool completely, transfer to freezer-safe containers, and freeze for up to 6 months. Defrost fully before serving.
5. How long will homemade green tomato chutney last?
If stored in sterilized jars in a cool, dark cupboard, it can last for 6–12 months unopened. Once opened, refrigerate and consume within 4–6 weeks.
6. Can I make this chutney less spicy?
Absolutely! Reduce or omit the cayenne pepper for a milder flavor. You can also add extra apples or sugar to balance out any heat.
Conclusion
Making Mary Berry’s Green Tomato Chutney is not just a great way to use up unripe tomatoes, but also a satisfying kitchen project that rewards you with jars of sweet, spiced goodness. Every spoonful tells a story of autumn harvests, warm spices, and the joy of preserving traditions.
Whether you enjoy it with a cheeseboard, tucked into a sandwich, or alongside your Sunday roast, this chutney will soon become a staple in your pantry. Once you’ve made it, you’ll understand why Mary Berry’s recipe remains a timeless favorite in British homes.
So, roll up your sleeves, grab those green tomatoes, and let’s turn them into something truly delicious!

Sophia Smith is a passionate home baker and dessert enthusiast who loves sharing her favorite recipes, baking tips, and kitchen secrets. Through Roses Baking Passion, she inspires others to bake with love and creativity every day.