Peanut Butter Sticks Recipe | Easy & Crispy Homemade Snack
If you’re like me and love peanut butter in all forms, you’re going to fall in love with these Peanut Butter Sticks. They’re crispy on the outside, creamy on the inside, and coated with just the right amount of sweetness. What makes this recipe even better is that it’s budget-friendly and only requires a handful of pantry staples.
These sticks are versatile; you can enjoy them fresh, pop them in the freezer for a chilled snack, or serve them as a playful finger food at parties. Whether you’re looking for a quick afternoon pick-me-up or a unique dessert idea, these homemade peanut butter sticks are sure to hit the spot.
Step-by-Step Preparation
Making peanut butter sticks at home is so easy that you’ll wonder why you didn’t try it sooner. Just follow these simple steps:
Preparing the Bread
Start with day-old white bread; it crisps up beautifully. Trim off the crusts with a sharp knife, and don’t toss them! We’ll use those later. Cut each bread slice into thin, even strips. This gives your peanut butter sticks that classic shape and perfect bite-size crunch.
Baking for Crispness
Arrange the strips on a baking sheet and bake at 200°F (93°C) for 45–60 minutes, or until they’re completely crisp and golden. This slow bake ensures the bread sticks dry out entirely, giving them a sturdy base that won’t go soggy when coated. Let them cool completely before moving to the next step.
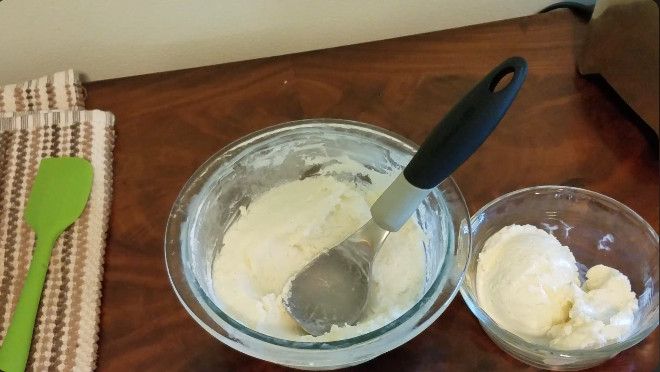
Mixing the Peanut Butter Filling
While the bread cools, mix peanut butter, vegetable oil, and sugar in a medium bowl. Stir until smooth and creamy. The oil makes it easier to coat the bread evenly, while the sugar adds just the right touch of sweetness.
Crushing the Crusts
Remember those trimmed crusts? Crush them finely with a rolling pin or grinder. These crumbs will be used to coat the peanut butter sticks, giving them extra crunch and a rustic finish.
Baking & Coating Process
Once you’ve prepped everything, it’s time to assemble your peanut butter sticks:
- Dip the Bread Strips – Take each cooled bread strip and dip it into the peanut butter mixture. Use tongs or your fingers to coat them evenly.
- Roll in Crust Crumbs – Immediately roll the coated strip in the crushed bread crumbs, pressing gently so they stick well.
- Shake Off Excess – Give each stick a gentle shake to remove extra crumbs.
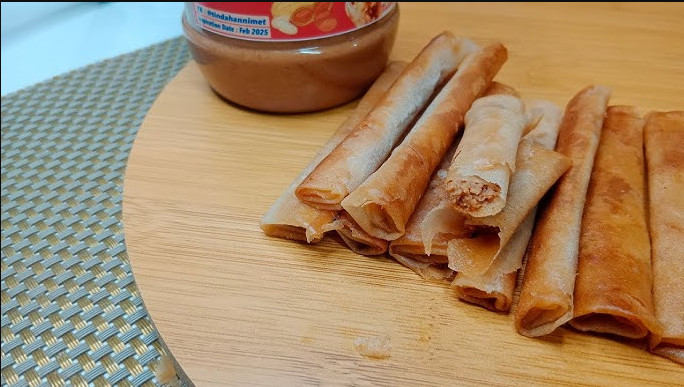
- Serve & Enjoy – Arrange them on a serving plate and enjoy right away for the best texture.
These sticks are crispy, nutty, and just sweet enough to satisfy any peanut butter craving.
Serving and Decoration
One of the best things about Peanut Butter Sticks is how versatile they are when it comes to serving. Here are some of my favorite ways to enjoy and dress them up:
- Classic Style – Serve them plain, just as they are. The crispy coating and creamy peanut butter filling already make them irresistible.
- Dust with Powdered Sugar – A light dusting of powdered sugar adds a sweet touch and makes them look extra tempting.
- Dip in Chocolate – Melt a bit of dark or milk chocolate and dip the ends of the sticks. This creates a candy-like finish that kids and adults both love.
- Sprinkle with Nuts – For extra crunch, sprinkle crushed peanuts or almonds over the coated sticks before they set.
- Fun for Kids – Serve with a small cup of warm chocolate or honey for dipping, it’s interactive and fun!
Tips for Best Results
To make sure your Peanut Butter Sticks turn out perfect every time, here are some tried-and-true tips:
- Pick Quality Peanut Butter – Use a creamy, rich peanut butter for smooth coating. Crunchy peanut butter works too if you love texture.
- Don’t Skip the Baking – The bread needs to be fully crisp before dipping; otherwise, it can turn soggy.
- Work Quickly – Once dipped, roll the sticks in crumbs immediately so the coating sticks well.
- Chill for a Twist – Pop the coated sticks in the freezer for 15–20 minutes before serving. They make a refreshing, cool snack, especially in the summer.
- Customize the Sweetness – Add more or less sugar depending on how sweet you like your snacks.
With these tips, you’ll be making snack-worthy peanut butter sticks that taste bakery-perfect every time.
Storage Instructions
Keeping Peanut Butter Sticks Fresh
These peanut butter sticks are best enjoyed fresh, but you can store them for later. Please place them in an airtight container at room temperature for up to 2 days. Please keep them in a cool, dry place away from heat or sunlight to prevent the peanut butter from softening too much.
Freezing for Later
If you’d like to make a batch ahead of time, peanut butter sticks freeze really well. Arrange them in a single layer on a tray, freeze for 1 hour, then transfer to a freezer-safe bag. They can be stored in the freezer for up to 1 month. When ready to enjoy, thaw at room temperature or eat them frozen for a crunchy, cool treat.
Peanut Butter Sticks Recipe
Ingredients
Video
Notes
Required Kitchen Tools
When making Peanut Butter Sticks, having the right tools makes the process easier and keeps things neat:- Sharp Knife – To trim the bread crusts and cut the slices into strips.
- Baking Sheet – For crisping the bread in the oven.
- Mixing Bowl – To combine peanut butter, oil, and sugar.
- Rolling Pin or Grinder – To crush the bread crusts finely for coating.
- Tongs or Fork – Helpful for dipping and coating the bread strips evenly.
Frequently Asked Questions (FAQ)
Can I use whole wheat bread instead of white bread?
Yes, you absolutely can! Whole wheat bread gives the peanut butter sticks a slightly nuttier flavor and adds extra fiber. Just make sure it’s day-old bread, so it crisps up nicely in the oven.
What type of peanut butter works best?
I recommend creamy peanut butter for a smooth coating, but crunchy peanut butter also works if you love extra texture. Natural peanut butter can be stirred well to make sure the oil is blended.
Can I make Peanut Butter Sticks without sugar?
Yes! If you’d like a healthier version, you can skip the sugar or replace it with honey or maple syrup. Just note that it will slightly change the texture and sweetness.
How long do Peanut Butter Sticks last?
They taste best fresh but will keep for up to 2 days in an airtight container at room temperature. For more extended storage, you can freeze them for up to 1 month.
Can I dip Peanut Butter Sticks in chocolate?
Definitely! Dipping them in melted chocolate (dark, milk, or white) adds a fun twist. You can even sprinkle chopped nuts, shredded coconut, or sprinkles on top while the chocolate sets.
Are Peanut Butter Sticks kid-friendly?
Absolutely! Kids love the crunchy texture and nutty flavor. They also make a great lunchbox snack or after-school treat. For extra fun, serve them with a small cup of honey or chocolate sauce for dipping.
Conclusion
And there you have it, my homemade Peanut Butter Sticks Recipe! With just a few simple steps, you can turn everyday bread and peanut butter into a crispy, creamy, and absolutely delicious snack. These sticks are perfect for kids’ lunchboxes, after-school treats, or even as a quick dessert when you’re craving something sweet.
The best part? You can make them your own, dip them in chocolate, add sprinkles, or keep it classic. No matter how you serve them, these peanut butter sticks are guaranteed to become a family favorite.
So grab that jar of peanut butter, roll up your sleeves, and treat yourself to a batch of these crunchy, nutty delights. Trust me, once you try them, you’ll be making them again and again.

Sophia Smith is a passionate home baker and dessert enthusiast who loves sharing her favorite recipes, baking tips, and kitchen secrets. Through Roses Baking Passion, she inspires others to bake with love and creativity every day.